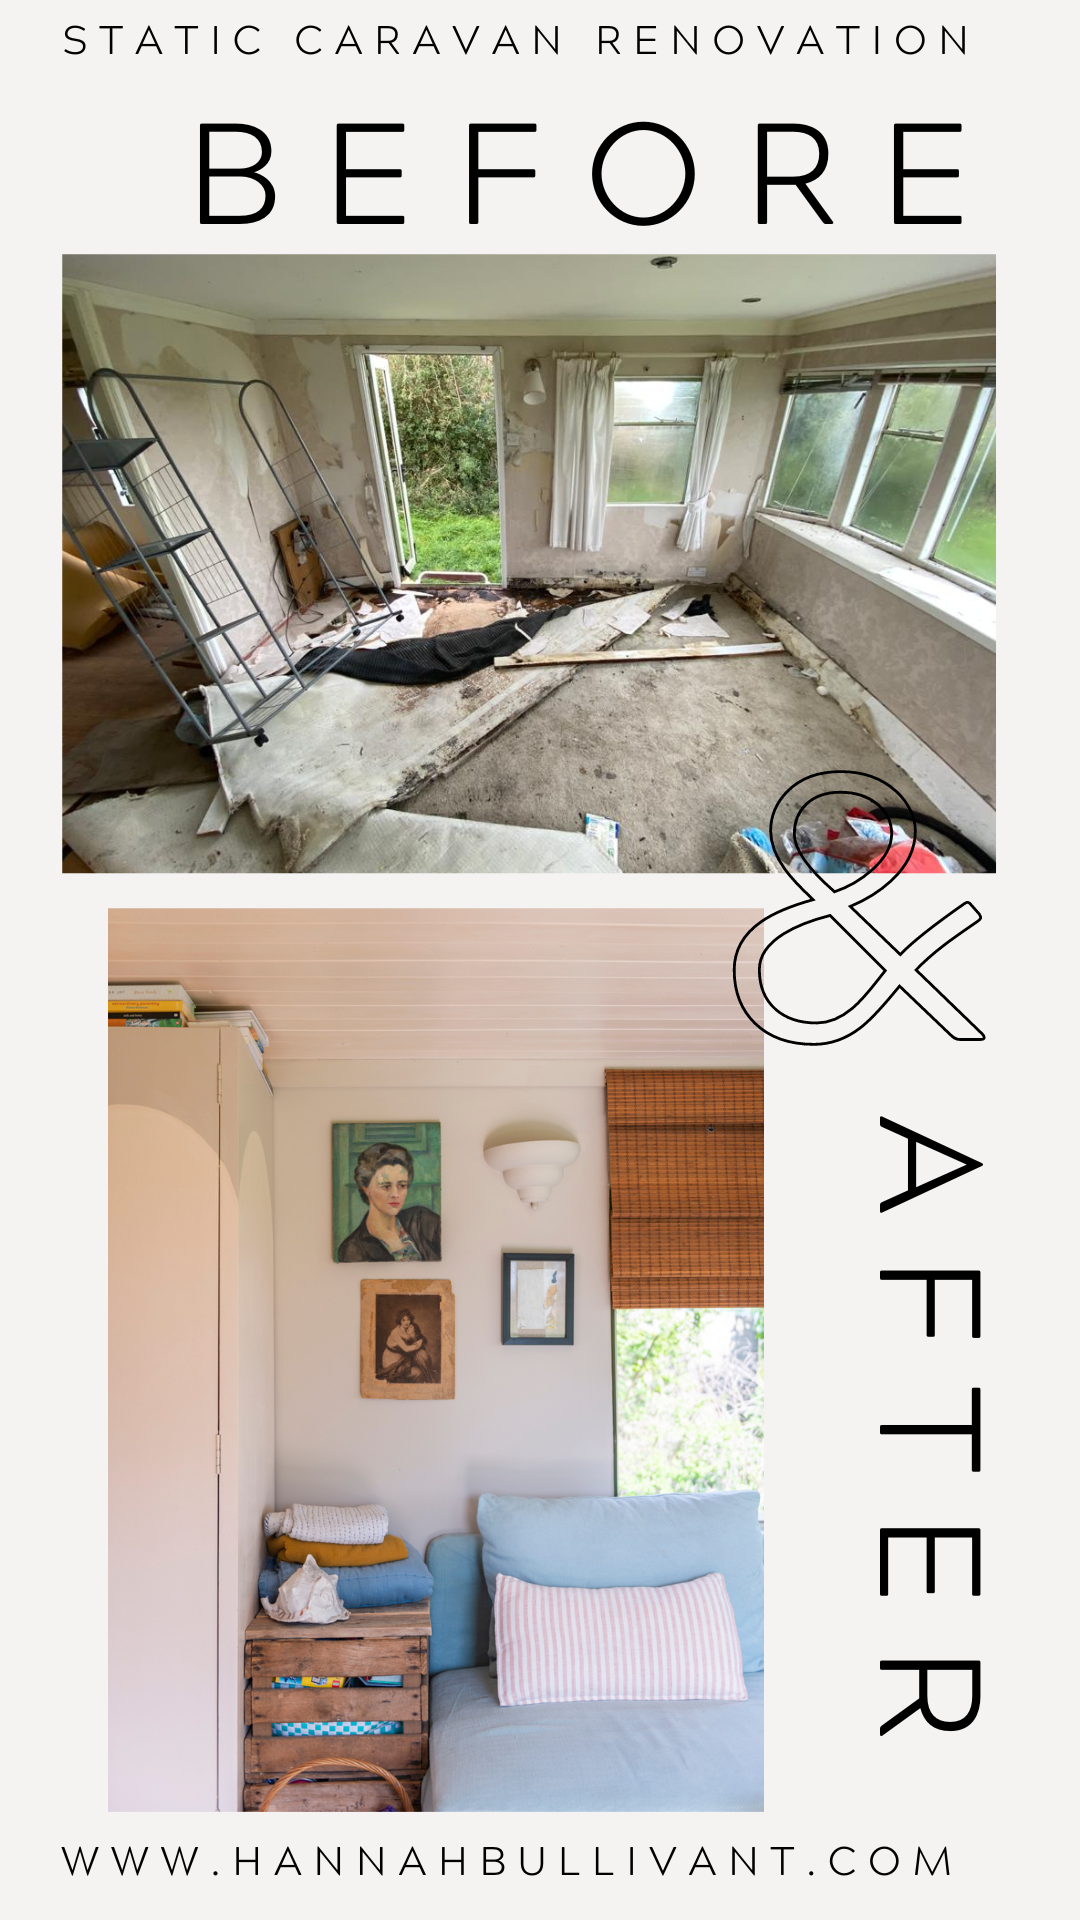
Budget Static Caravan Makeover- how we renovated a £150 static caravan into a chic wooden lodge
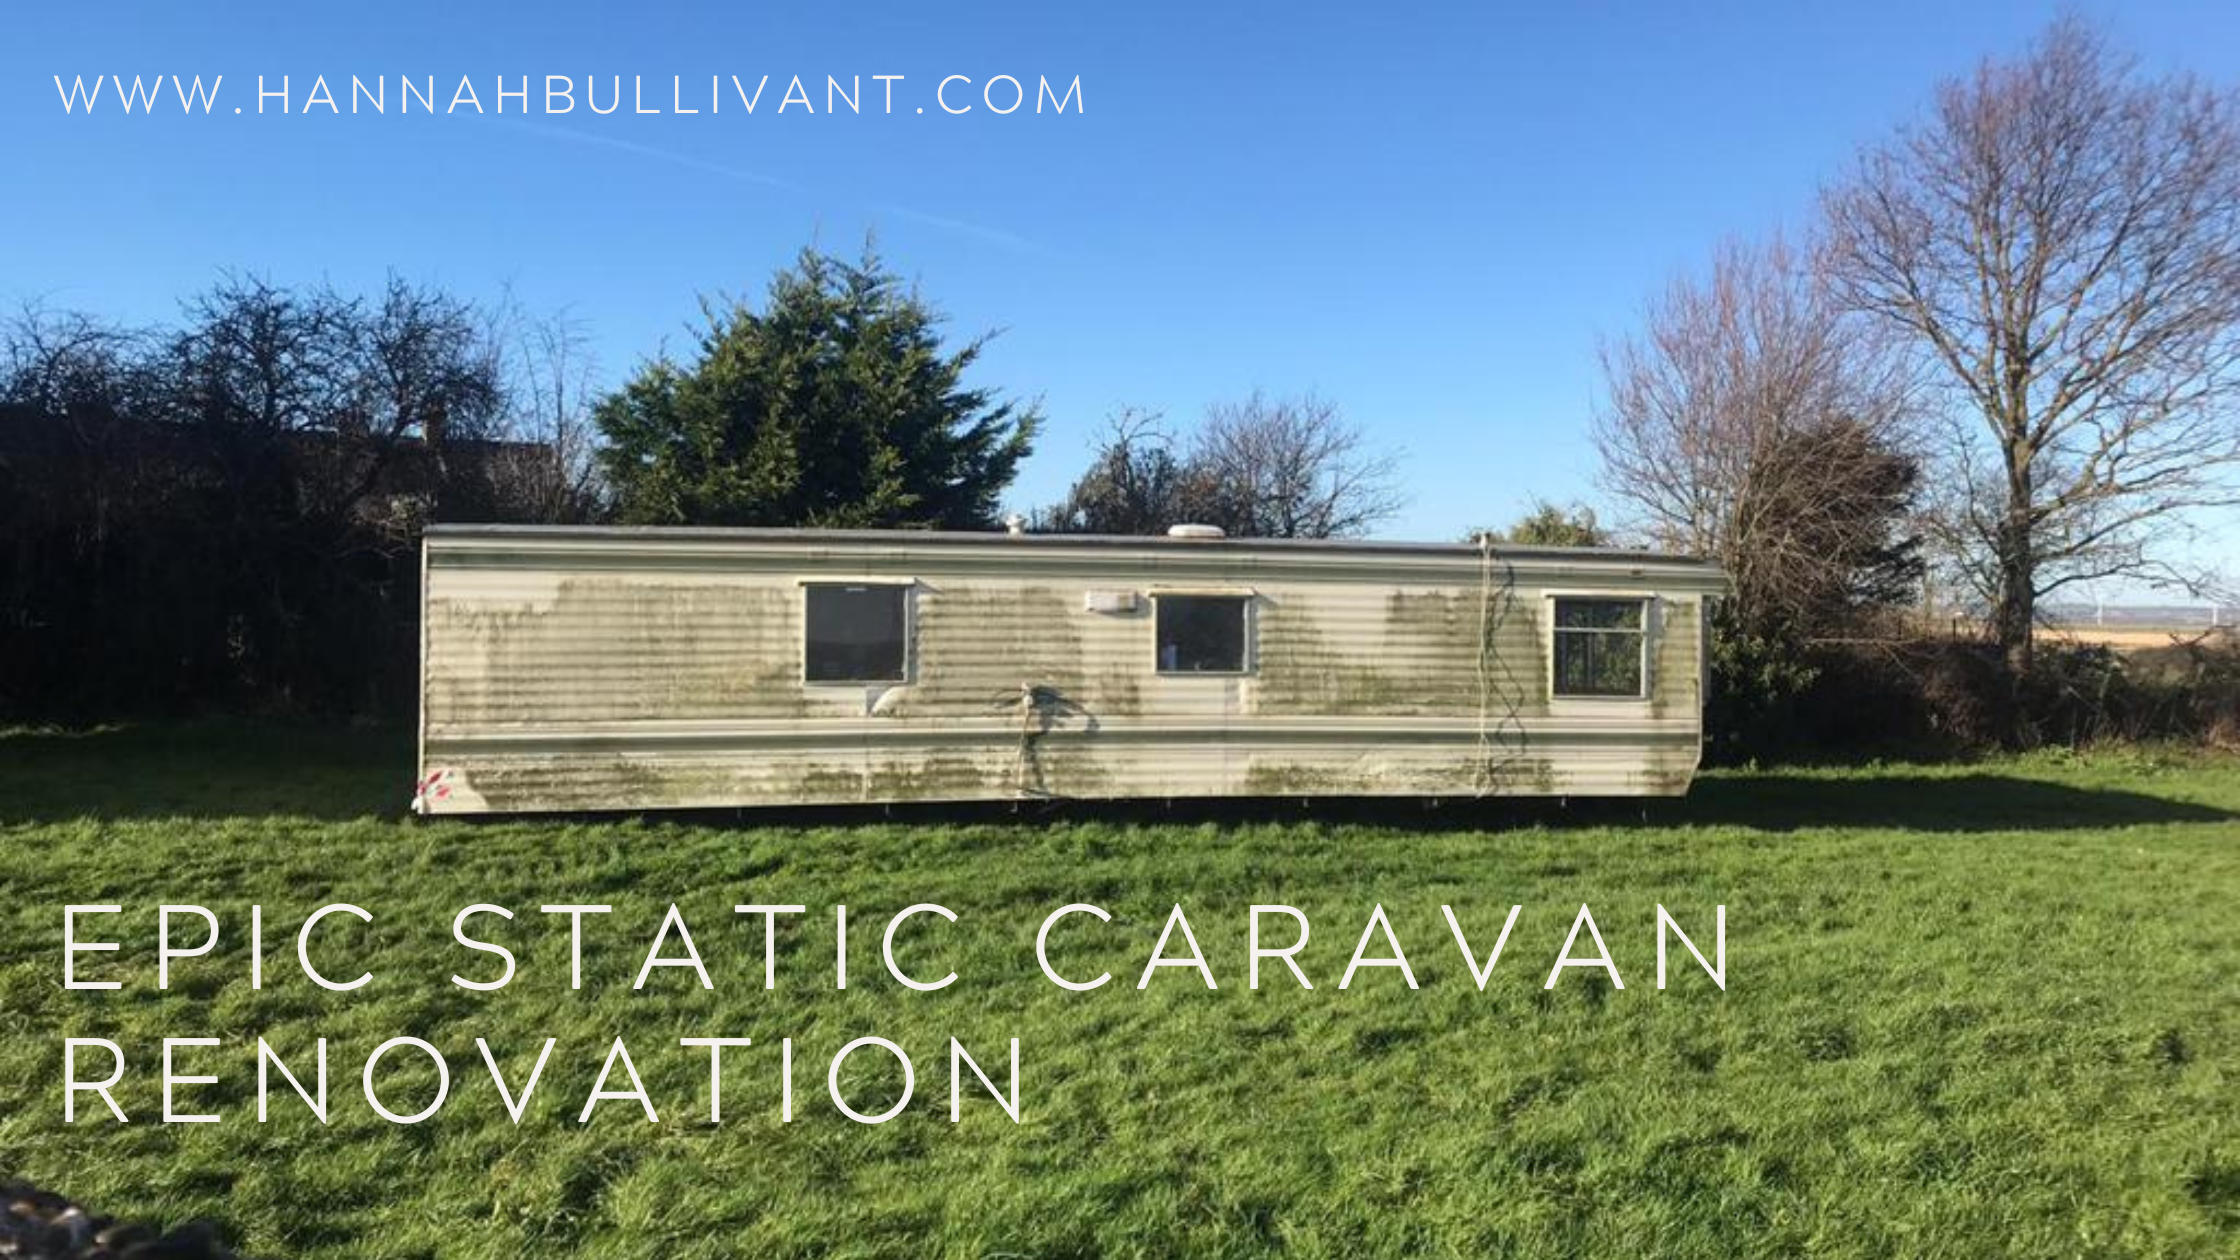
In January 2021 we began a static caravan renovation with our friends. We bought it for the grand sum of… £150. It was a wreck.
Why a wreck of a caravan?
We’d been given notice on our rental home a few months prior and were stuck. Rental prices were high, and at that point work had dried up for us both. (one of us was styling events and photoshoots, the other was directing music videos and commercials- both industries died overnight)
The static idea initially came up as a joke….which quickly became reality! Our friends wanted guest accommodation on their land. We offered to build it for them whilst living with them rent-free. We thought it would be a fun project! We wanted to practice some DIY and renovation skills, I wanted to flex my design muscles (with almost free reign from our friends- the clients- this never happens!) With no work, Dave figured he’d have time to renovate. We made a deal with our friends and got to work.
When did you start renovating it?
It was towed onto the land at the end of January 2021. We needed to ask the local villagers to move their cars for us (The drama this caused!) and our neighbouring farmer ended up having to help move it with his tractor.
It was hairraising! Terrifying! It nearly didn’t fit!
But it did, finally, after taking out a few fence posts. 🙈
Between January-May, Dave worked almost full time on the van, although as luck would have it, his “quiet season of work” became really busy. So it was hard graft, for us both. He was juggling the reno and work, I was juggling my work, the kids and packing our home up by myself.
Dave learned what he needed to learn from Youtube, from our friend Tom and through trial and error. The learning curve was steeeep.
We eventually moved in with our friends to continue renovating the van the following May. We came to LOVE living communally it was one of the highlights of our time there.
We made plenty of mistakes along the way, but we’re so proud of what we created. We did it all ourselves (me, Dave and the friends we share the land with) for very little money. We learned so so much along the way. Below are some before and afters to whet your appetite.
What was communal living like?
We were a bit apprehensive about this part of the project. These are some of our best friends and we wanted to protect our friendship at all costs. But it was amazing. Truly, amazing. Our friend’s house isn’t huge, but we had our own room and the kids had a separate room too. There is so much land there that we never felt hemmed in, we spent a lot of time outside. We spent lots of each day in the van working on it. It was AMAZING to share cooking, childcare, vegetable growing, and lifts. Emma and I walked, ran and worked out together most days, and our daily post-school chats became one of my favourite parts of the day. The kids became like siblings; sometimes getting along really well, and sometimes really fighting! On the whole, they absolutely loved having friends they could play with without adults organising it. From a professional perspective, this was a hybrid personal/professional project which we navigated really well.
When did the project finish?
The caravan was finished in April 2022 so it took just over a year of DIY. Living with our friends was only ever temporary, and for as long as it took to do the van. We moved out of our friend’s place in the summer. By this point, we wanted some more space and our daughter desperately wanted her own room. The plan was to try to save to buy a house but this, unfortunately, didn’t happen (thanks to unpredictable freelance work! The house-buying plan is ongoing, and in the current economy, it might be verrrry ongoing)
Any regrets about the project?
We have very few regrets about the project. We learned so much about renovation and DIY. Skills that we’ll use for life. We loved communal living and would love to somehow do it again if we could. We have already been back to stay as guests and it’s wonderful to have somewhere so completely wonderful to escape to for the night every now and then!
We regret slightly how INTO it we got 🤣. We thought we’d be able to continue juggling other work, but that didn’t happen in the way we needed it to. The project became all-consuming, and we just didn’t have the energy. It was fun! Things like the youtube channel had to go in the midst of the juggle of it. But now we know the reality of renovating and will be more realistic when it comes to our next project.
The caravan is one of the most ambitious design projects I’ve ever done, not least because we did it on such a tiny budget. But I’m incredibly proud of what we created. Our friends are delighted with it! They now have somewhere their friends, and most importantly, their elderly parents can stay, comfortably. So much of it is recycled so it feels good from an eco perspective, too.
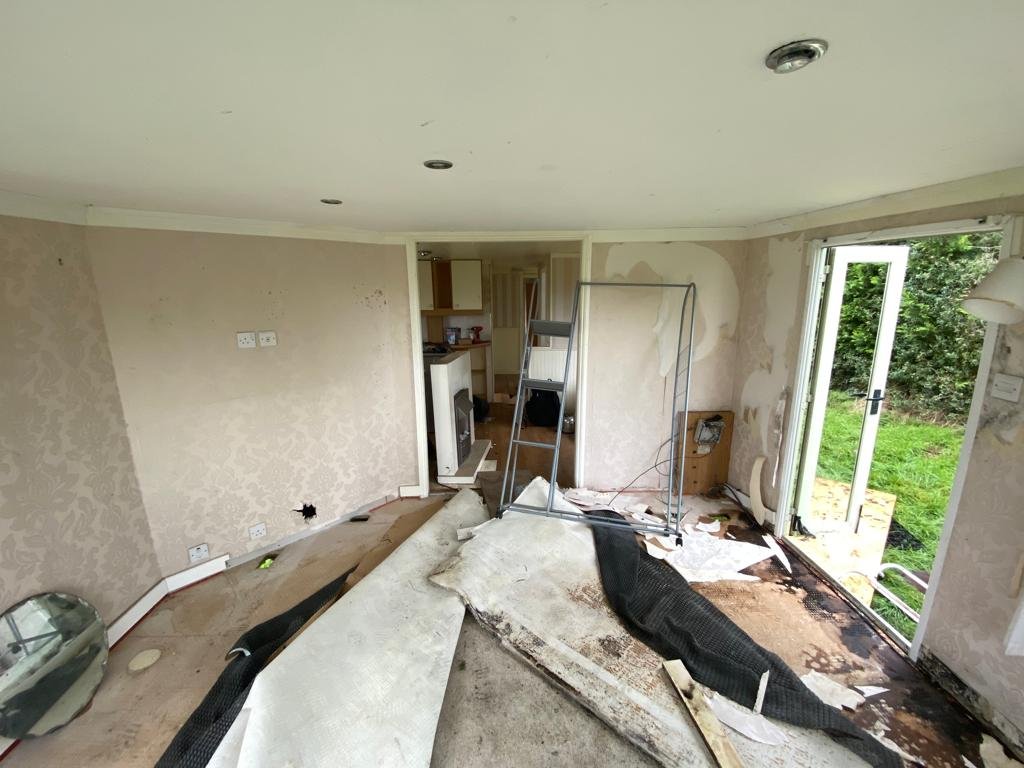
The gruesome ‘before’
We knew it was a wreck- we wanted a wreck! But we underestimated just how bad it was. There was a lot of rot in the bathroom which was smelly. Doors and windows had broken so there was a lot of damp everywhere, and a lot of dirt. A lot of crap had been left inside, including broken toastie makers, kettle, smashed up oven as well as some truly gross stuff, like (wait for it) used condoms, razors and used sanitary pads. OH MAN.
Our plans (🤣)
Our plan was to knock down one small wall in the living area, fix the floor and decorate it as nicely as we could. We were going to use what was there but make it a really beautiful bijou space to holiday in. But once we got it in place, we realised that the rotting floor extended out of the bathroom and into the kitchen, living area and one of the bedrooms. 🙈😭
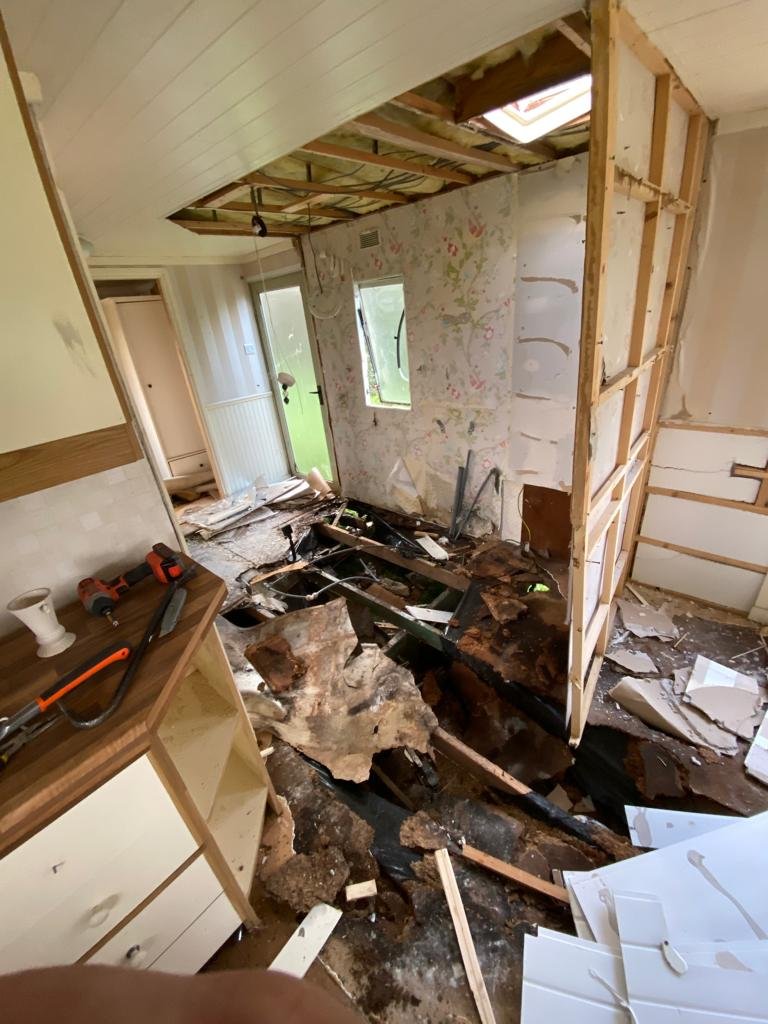

The rot that changed everything
The rotting floor changed our plans drastically. We needed to rip all the walls out so we could properly fix the floor. After much angst, and lots of discussion with our friends and clients, we realised this actually offered us an opportunity to completely change the layout of the space. We decided to build a small extension to the back of the van to house a bathroom, utility cupboard and composting toilet. This meant the rooms in the van could be made much larger - extending into the corridor (well, they’re still tiny, but you know). This added on a fair chunk of budget, doubling what we initially wanted to spend, but it was worth it.